Single sign-on (SSO) for Confluent Cloud
Confluent Cloud allows for single sign-on (SSO) using your existing
SAML-based IdP (identity provider).
SSO provides access control for multiple independent software systems. With SSO,
enterprise users can log in to multiple, unrelated systems using a single user
ID and password, which means enterprises no longer have to store and manage
passwords in company databases. SSO also improves security and decreases service
and troubleshooting issues associated with individual logins.
You configure SSO at the organizational level. After enabling SSO for an
organization, by default newly-created users will only be able to authenticate
using SSO. You can also revert the SSO configuration to a disabled state.
Users created or invited during the period when SSO is enabled do not receive
local passwords, and must use the password reset form to set a local password
for their account. After resetting the local password, users can log in using
the main Confluent Cloud login page. SSO users cannot reset their passwords while SSO
is enabled for their organization.
SSO Prerequisite
You must have an existing SAML-based IdP, such as Okta, OneLogin, or Azure Active
Directory (AD).
Limitations
In an IdP-initiated flow, Confluent Cloud cannot verify that the end-user initiated the
flow, which leaves users vulnerable to Cross-Site Request Forgery (CSRF) attacks.
Therefore, IdP-initiated login flows for SSO are not supported. Several IdPs provide
workarounds to simulate IdP-initiated login flows, such as
the Okta bookmark application.
Confluent Cloud SSO does not support any single log-out (SLO) protocols.
SSO Terminology
These terms play a key role in the implementation of SSO for Confluent Cloud:
- Identity provider (IdP)
- Enterprise’s corporate user directory. SSO users are redirected to the IdP
for authentication.
- IdP-initiated login
- For an IdP-initiated login, users access Confluent Cloud using an IdP, such as Okta.
- Local user
- Also known as a “non-SSO user”, this user possesses a password that is stored
in the Confluent Cloud database, and is authenticated directly by the Confluent Cloud back-end.
- Service provider-initiated login
- For a service provider-initiated login, users access the Confluent Cloud login page,
and are then redirected to their IdP to log in.
- SSO user
- User who authenticates to Confluent Cloud using his or her own Enterprise IdP.
Confluent Cloud SSO workflow
Browser
After SSO is enabled, users log in at confluent.cloud/login/sso/<sso-identifier>.
The browser makes an OpenID connect request to the identity broker at login.confluent.io,
which then redirects the browser to send a SAML request to the organization’s IdP.
After the user successfully authenticates, the IdP responds with a signed SAML
ID Assertion, which the identity broker translates into a JSON Web Token (JWT).
Confluent Cloud uses this token to authenticate additional requests from the browser.
CLI
When SSO is enabled and the ccloud login command is issued, the following
browser-based workflow is launched:
- Generates an HTTP server on
localhost to receive the authentication callback.
- Initiates the SSO flow by navigating to
login.confluent.io in the browser.
- The browser automatically redirects the user to the IdP login page.
- Upon a successful login, the browser redirects the user back to
localhost with
a signed id_token.
- Confluent Cloud CLI uses the
id_token to obtain a Confluent Cloud back-end session.
Note
If the Confluent Cloud CLI is running on a server without a web browser (also known as a “jump”
host”), then this flow does not work. In such cases, you must log in using the --no-browser
option. For details, refer to Logging in using the Confluent Cloud CLI.
Configuring SSO
Sign in to Confluent Cloud at https://confluent.cloud.
Navigate to ADMINISTRATION -> Security.
On the Security page Authentication tab, click Enable.
Specify your SSO identifier, which uniquely identifies your organization and
will determine your SSO login link URL. Your SSO identifier should only include
lowercase letters, numbers, and the “-” character.
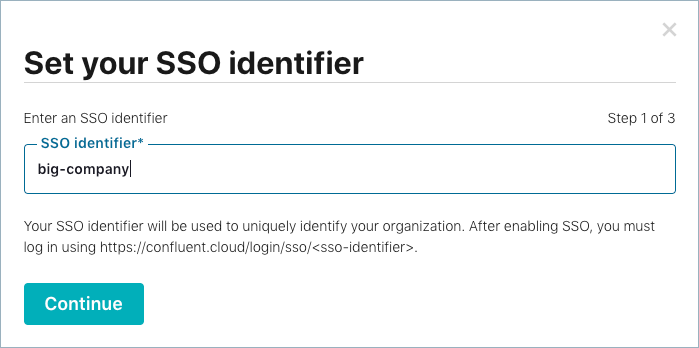
Click Continue.
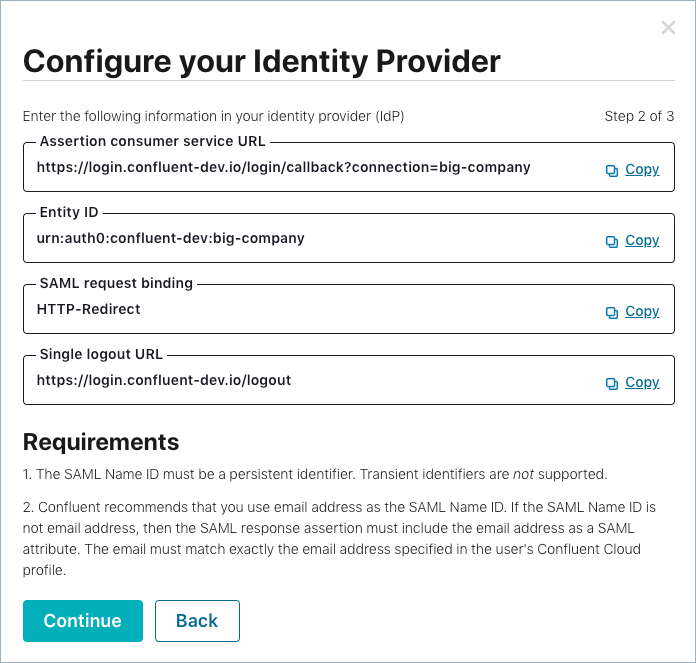
The details required to configure your IdP are displayed. Your IdP uses this
information to accept authentication requests from the valid SAML service provider.
Copy and paste the IdP configuration information into your IdP (for
example, in Okta, you can find this information on the SAML settings page):
Important
Do not specify transient identifiers (nameid-format:transient) for the
Name ID; they are not supported. We recommend that you use an email address
for the Name ID. If the Name ID is not an email address, then the SAML
response assertion must include the email address as a SAML attribute. The
email specified must match exactly the address specified in your Confluent Cloud
profile. Valid Name IDs must use one of the formats: nameid-format:persistent,
nameid-format:emailAddress, or nameid-format:unspecified.
If the SAML Name ID format is not emailAddress, then the SAML response
assertion must include the email address as a saml:Attribute.
Click Continue.
Configure SSO settings using information from your IdP:
- Click Upload signing certificate to add your CA certificate.
- Enter your IdP SAML sign-on URL. In the example, the SAML sign-on URL is based on using Okta for SSO.
- Specify an Email mapping to ensure your email address is mapped to a SAML
attribute. You can specify a value, or use one of the default options
provided: Name Identifier, Name, or email address.
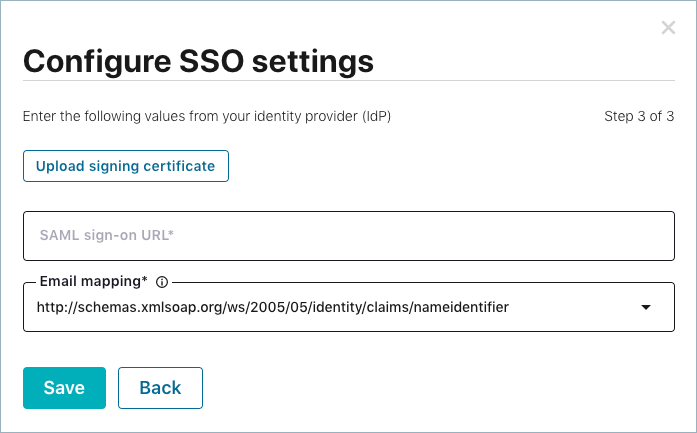
Click Save.
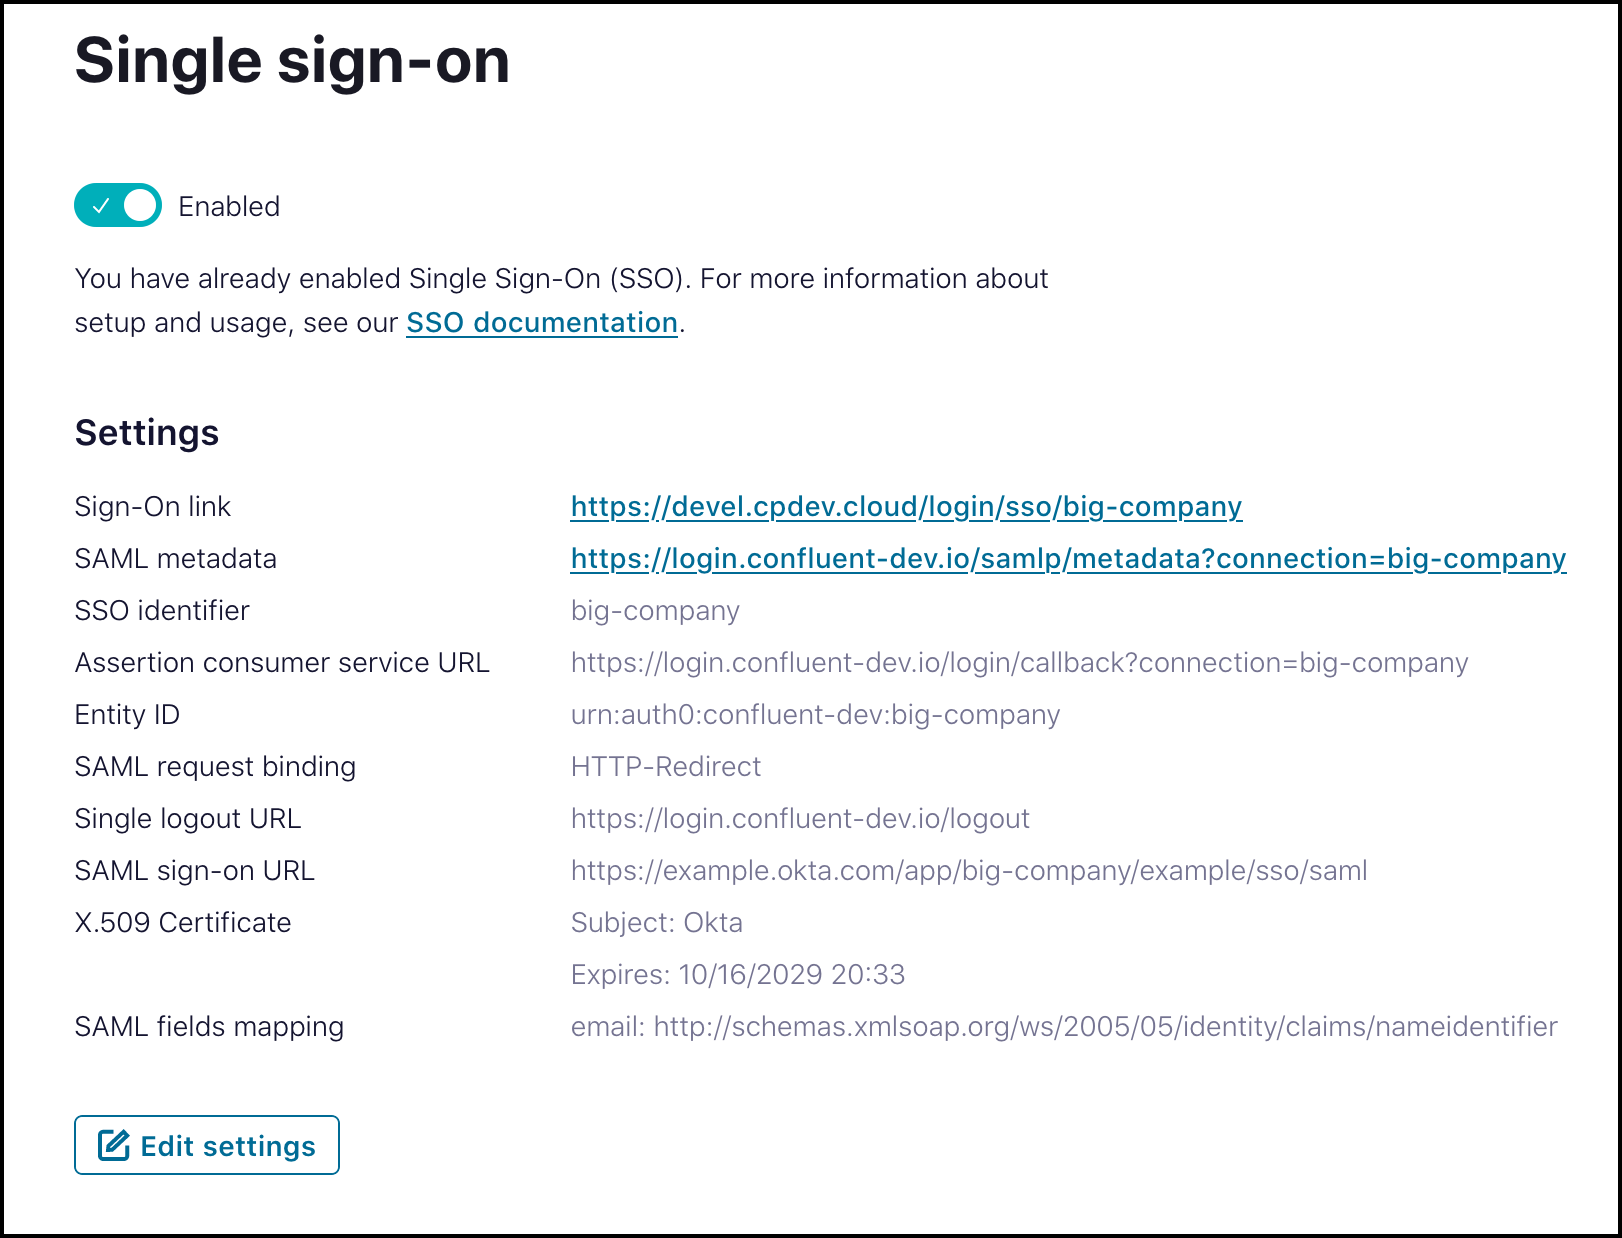
Following is an example of the SAML settings page for the Okta IdP that
displays the values that were copied and pasted from Configure your Identity
Provider:

View a summary of your SSO configuration on the Single Sign-On (SSO) page.
Click Edit if you need to change any values or if the values
displayed do not match the data from your IdP.
Verify SSO configuration
To verify your SSO configuration, navigate to your new login URL using the sign-on link
displayed in the Single Sign-On (SSO) summary (confluent.cloud/login/sso/<sso-identifier>, which
in this workflow example is https://confluent.cloud/login/sso/big-company).
You are redirected to your organization’s sign-on page. After entering your IdP
login credentials, you are redirected back to the Confluent Cloud application.
Interactions with the application are almost identical to the non-SSO experience.
The major difference is that you are unable to change your password in the Confluent Cloud
user interface or using the “Reset Password” flow, because your password is now
managed by your IdP.
Adding users
To log in to Confluent Cloud, users must be invited to join the organization.
To add users to your organization, navigate to ADMINISTRATION -> Accounts.
On the Accounts page, click Add user. Enter the email of the user you wish to add. This
user will receive an email notifying them that they have been invited to the
organization.
Users must log in using the new organization-specific SSO URL. For example,
https://confluent.cloud/login/sso/<sso-identifier>.
If a user does not have a Confluent Cloud account and attempts to log in using the IdP,
they will receive an “Invalid username” message.
Note
When SSO is enabled, users do not have to verify their email address before
logging into Confluent Cloud; if their IdP credentials are valid and they
have a profile in Confluent Cloud, they can log in.
You can add local users after SSO is enabled for your organization. When adding
local users after SSO is enabled, be sure to uncheck the Add as SSO user check
box, which is enabled by default.

Logging in using the Confluent Cloud CLI
After SSO is enabled, you have the option of logging in using the Confluent Cloud CLI:
If the Confluent Cloud CLI is running on a server without a web browser (also known as
a “jump host”), then you cannot log in using ccloud login. In such cases,
you must use the --no-browser option:
ccloud login --no-browser
After running this login command, you receive a printout of a URL, which you must
copy and paste into a local browser. After you provide your credentials and
successfully log in, the browser displays a code that you must copy and paste
back into in the Confluent Cloud CLI. Your workflow should look like the following:
ccloud login --no-browser
Updates are available for ccloud. To install them, please run:
$ ccloud update

Enter your Confluent credentials:
Email: smith@confluent.io
Navigate to the following link in your browser to authenticate:
https://login.confluent.io/authorize?response_type=code&code_challenge=NovO_c6FO44G-6cfRbqTrBcEOrDnvm7GNZLCHCmbPM8&code_challenge_method=S252&client_id=hPbGLM8G55HSaUsaaieiiAprnJaEc3rH&redirect_uri=https://confluent.cloud/cli_callback&scope=email%20openid&audience=https://confluent.auth0.com/api/v2/&state=CoOGX1aQhvwdH2dFSvKV-gh09INnYcXFaYbUnWq3Ekw&connection=big-company

After authenticating in your browser, paste the code here:
#### The following code was copied and pasted from the browser #####
CoOGX1aQhvwdH2dFSvKV-gh09INnXcXFaYbUnWq3Ekw/bf1jJFSANhlQBqPn
Logged in as smith@confluent.io
Using environment t21388 ("default")
Logging in using the Confluent Cloud UI
After new users are invited to use SSO, they
receive an email notification that includes a link to the new SSO login page.
The wording and format of the notification will vary by organization,
but it will always include a link that the recipient must click to accept the
invitation and complete account setup.
Note
The link in the notification is for one-time use. Do not share the link with
other users in your organization. This link only works for the recipient of the
email notification.
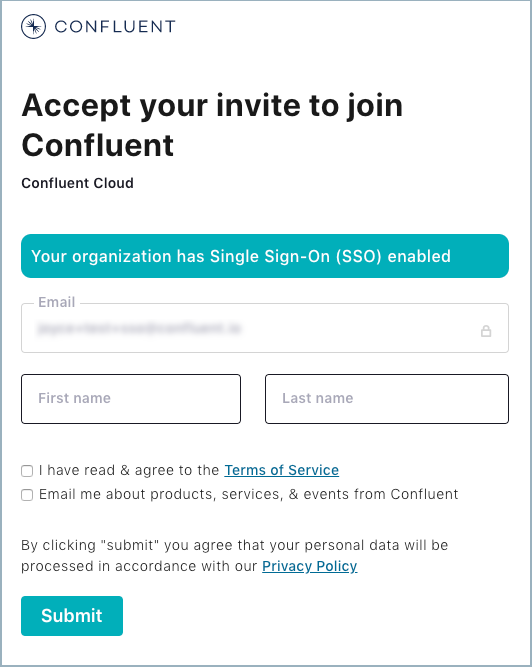
Fill in the acceptance form and click Submit. The new SSO login screen appears.
The organization-specific SSO login URL should look like
https://confluent.cloud/login/sso/<sso-identifier>, where sso-identifier
is replaced by the identifier for your organization. This is your new permanent
Confluent Cloud SSO login page. If using bookmarks, save this URL.
Disabling SSO
To disable SSO:
- Navigate to ADMINISTRATION -> Security.
- On the Security page Authentication tab, click Disable.
When SSO is disabled, your organization’s team members will no longer be
able to sign in using your IdP, and must use Forgot Password to create a
Confluent Cloud password.
To re-enable SSO, you must repeat the steps in Configuring SSO.
Troubleshooting SSO
If you attempt to log in for the first time after enabling SSO while you are still
signed in to your IdP, you may be logged in immediately and bypass the IdP login
window. If this occurs, log out of your IdP session, then log in using an incognito
browser window.