Google Cloud Storage Sink Connector for Confluent Cloud
You can use the Kafka Connect Google Cloud Storage (GCS) sink connector for
Confluent Cloud to export Avro, JSON Schema, Protobuf, JSON (schemaless), or Bytes data
from Apache Kafka® topics to GCS in Avro, JSON, or Bytes format. Additionally, for
certain data layouts, the GCS connector exports data by guaranteeing
exactly-once delivery semantics to consumers of the GCS objects it produces.
Features
The Google Cloud Storage (GCS) sink connector provides the following features:
Exactly Once Delivery: Records that are exported using a deterministic partitioner are delivered with exactly-once semantics regardless of the eventual consistency of GCS.
Data Format with or without a Schema: The connector supports Avro, JSON Schema, Protobuf, JSON (schemaless), or Bytes input data formats and Avro, JSON, or Bytes output formats. Schema Registry must be enabled to use a Schema Registry-based format (for example, Avro, JSON_SR (JSON Schema), or Protobuf).
Schema Evolution: schema.compatibility is set to NONE.
Scheduled Rotation and Rotation Interval: The connector supports a regularly scheduled interval for closing and uploading files to storage. See Scheduled Rotation for details.
Partitioner: The connector supports the TimeBasedPartitioner class based on the Kafka class TimeStamp. Time-based partitioning options are daily or hourly.
Flush size: flush.size defaults to 1000. The default value can be increased if needed. The default value can be lowered if you are running a Dedicated Confluent Cloud cluster.
The following scenarios describe a couple of ways records may be flushed to storage:
You use the default setting of 1000 and your topic has six partitions. Files start to be created in storage after more than 1000 records exist in each partition.
You use the default setting of 1000 and the partitioner is set to Hourly. 500 records arrive at one partition from 2:00pm to 3:00pm. At 3:00pm, an additional 5 records arrive at the partition. You will see 500 records in storage at 3:00pm.
Note
The properties rotate.schedule.interval.ms and rotate.interval.ms
can be used with flush.size to determine when files are created in
storage. These parameters kick in and files are stored based on which
condition is met first.
For example: You have one topic partition. You set flush.size=1000 and
rotate.schedule.interval.ms=600000 (10 minutes). 500 records arrive at
the topic partition from 12:01 to 12:10. 500 additional records arrive from
12:11 to 12:20. You will see two files in the storage bucket with 500
records in each file. This is because the 10 minute
rotate.schedule.interval.ms condition tripped before the
flush.size=1000 condition was met.
You can manage your full-service connector using the Confluent Cloud API. For details, see the Confluent Cloud API documentation.
Refer to Cloud connector limitations for additional information.
Quick Start
Use this quick start to get up and running with the Confluent Cloud GCS sink connector.
The quick start provides the basics of selecting the connector and configuring
it to stream events to a GCS bucket using either the Confluent Cloud GUI or the Confluent Cloud CLI.
- Prerequisites
Authorized access to a Confluent Cloud cluster on GCP.
The Confluent Cloud CLI installed and configured for the cluster. See Install and Configure the Confluent Cloud CLI.
Schema Registry must be enabled to use a Schema Registry-based format (for example, Avro, JSON_SR (JSON Schema), or Protobuf).
A GCP GCS bucket in the same region as your Confluent Cloud cluster.
A GCP service account. You download service account credentials as a JSON file. These credentials are used when setting up the connector configuration.
Important
Your GCP service account role must have permission to create new objects in the GCS bucket. For example, the Storage Admin role can be selected for this purpose. If you are concerned about security and do not want to use the Storage Admin role, only use the storage.objects.get and storage.objects.create roles. Also, note that the Storage Object Admin role does not work for this purpose.
- Kafka cluster credentials. You can use one of the following ways to get credentials:
- Create a Confluent Cloud API key and secret. To create a key and secret, go to Kafka API keys in your cluster or you can autogenerate the API key and secret directly in the UI when setting up the connector.
- Create a Confluent Cloud service account for the connector.
Caution
You can’t mix schema and schemaless records in storage using
kafka-connect-storage-common. Attempting
this causes a runtime exception. If you are using the self-managed version of this connector, this issue will be
evident when you review the log files (only
available for the self-managed connector).
Using the Confluent Cloud GUI
Complete the following steps to set up and run the connector using the Confluent Cloud GUI.
Step 2: Add a connector.
Click Connectors. If you already have connectors in your cluster, click Add connector.
Step 3: Select your connector.
Click the Google Cloud Storage Sink connector icon.
Step 4: Set up the connection.
Note
- Make sure you have all your prerequisites completed.
- An asterisk ( * ) designates a required entry.
Complete the following and click Continue.
Select one or more Topic names.
Enter a Connector Name.
Select an Input message format (data coming from the Kafka topic): AVRO, JSON_SR (JSON Schema), PROTOBUF, JSON (schemaless), or BYTES. A valid schema must be available in Schema Registry to use a schema-based message format (for example, Avro, JSON_SR (JSON Schema), or Protobuf).
Note
Input format JSON to output format AVRO does not work for the preview connector.
Enter your Kafka Cluster credentials. The credentials are either the API key and secret or the service account API key and secret.
Upload your GCP credentials JSON file.
Enter the GCS bucket name.
Select an Output message format (data coming from the connector): AVRO, JSON, or BYTES. A valid schema must be available in Schema Registry to use a schema-based message format (for example, Avro).
Note
The following Topic directory, Path format, and Time interval
properties can be used to build a directory structure for data stored in
S3. For example: You set Time interval to Hourly, Topics directory to
json_logs/hourly, and Path format to 'dt'=YYYY-MM-dd/'hr'=HH. The
result in S3 is the directory structure:
s3://<s3-bucket-name>/json_logs/daily/<Topic-Name>/dt=2020-02-06/hr=09/<files>.
Enter a Topic directory (Optional). This is a top-level directory path to use for data stored in S3. Defaults to topics if not used.
Enter a Path format (Optional). This configures the time-based partitioning path created in S3. The property converts the UNIX timestamp to a date format string. If not used, this property defaults to 'year'=YYYY/'month'=MM/'day'=dd/'hour'=HH if an Hourly Time interval was selected or 'year'=YYYY/'month'=MM/'day'=dd if a Daily Time interval was selected.
Select the Time interval that sets how you want your messages grouped in the S3 bucket. For example, if you select Hourly, messages are grouped into folders for each hour data is streamed to the bucket.
Enter a rotation interval (Optional). See Scheduled Rotation for details about the two Scheduled rotation properties.
Enter the Flush size. This value defaults to 1000. The default value can be raised (and lowered, if running a dedicated cluster).
The following scenarios describe a couple of ways records may be flushed to storage:
You use the default setting of 1000 and your topic has six partitions. Files start to be created in storage after more than 1000 records exist in each partition.
You use the default setting of 1000 and the partitioner is set to Hourly. 500 records arrive at one partition from 2:00pm to 3:00pm. At 3:00pm, an additional 5 records arrive at the partition. You will see 500 records in storage at 3:00pm.
Note
The properties rotate.schedule.interval.ms and rotate.interval.ms
can be used with flush.size to determine when files are created in
storage. These parameters kick in and files are stored based on which
condition is met first.
For example: You have one topic partition. You set flush.size=1000 and
rotate.schedule.interval.ms=600000 (10 minutes). 500 records arrive at
the topic partition from 12:01 to 12:10. 500 additional records arrive from
12:11 to 12:20. You will see two files in the storage bucket with 500
records in each file. This is because the 10 minute
rotate.schedule.interval.ms condition tripped before the
flush.size=1000 condition was met.
Enter the number of tasks for the connector to use.
The following are additional optional properties that can be used to organize your data in storage:
- Enter a Timestamp field name. The record field used for the timestamp, which is then used with the time-base partitioner. If not used, this defaults to the timestamp when the Kafka record was produced or stored by the Kafka broker.
- Select a Timezone. Use a valid timezone. Defaults to
UTC if not used.
- Select a Locale. This is used to format dates and times. For example, you can use
en-US for English (USA), en-GB for English (UK), en-IN for English (India), or fr-FR for French (France). Defaults to en. For a list of locale IDs, see Java locales.
Configuration properties that are not shown in the Confluent Cloud UI use the default
values. For default values and property definitions, see Google Cloud Storage
Sink Connector Configuration Properties.
Step 6: Launch the connector.
Verify the following and click Launch.
Step 7: Check the connector status.
The status for the connector should go from Provisioning to Running.
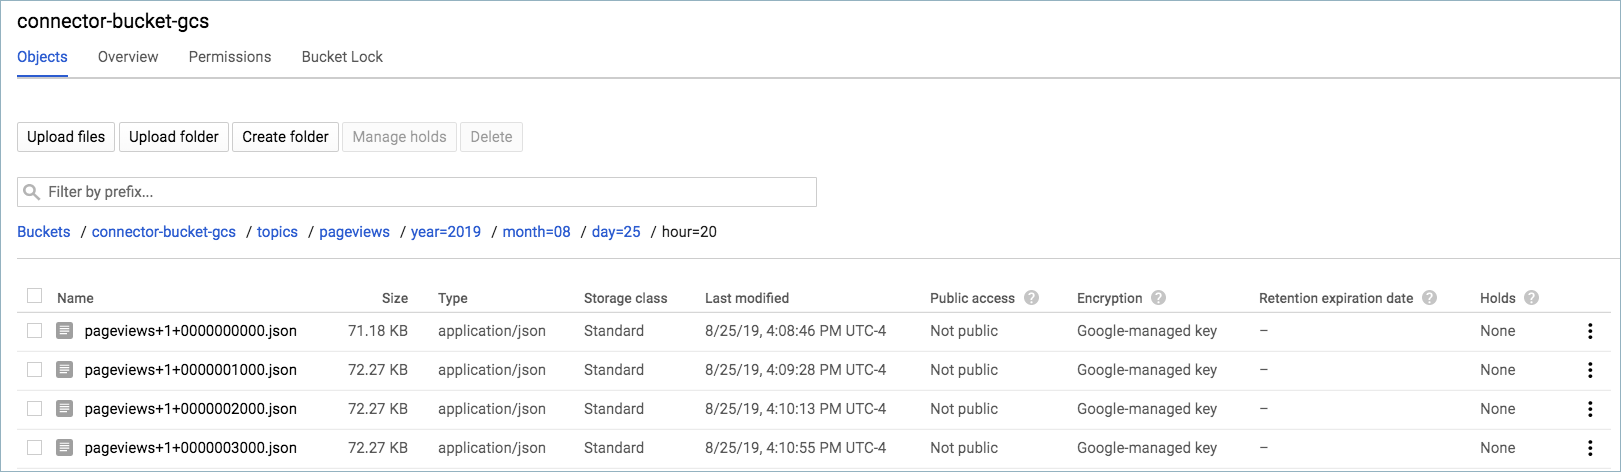
Step 8: Check the GCS bucket.
Go to the the bucket Objects page for your GCS bucket.
Open your topic folder and each subsequent folder until you see your messages displayed.
You can manage your full-service connector using the Confluent Cloud API. For details, see the Confluent Cloud API documentation.
Tip
When you launch a connector, a Dead Letter Queue topic is automatically created. See Dead Letter Queue for details.
For additional information about the GCS connector, see Google Cloud Storage
Sink Connector for Confluent Platform. Note that not
all Confluent Platform GCS connector features are provided in the Confluent Cloud GCS connector.
See also
For an example that shows fully-managed Confluent Cloud connectors in action with Confluent Cloud ksqlDB, see the Cloud ETL Demo. This example also shows how to use Confluent Cloud CLI to manage your resources in Confluent Cloud.
Using the Confluent Cloud CLI
Complete the following steps to set up and run the connector using the Confluent Cloud CLI.
Step 1: List the available connectors.
Enter the following command to list available connectors:
ccloud connector-catalog list
Step 2: Show the required connector configuration properties.
Enter the following command to show the required connector properties:
ccloud connector-catalog describe <connector-catalog-name>
For example:
ccloud connector-catalog describe GcsSink
Example output:
Following are the required configs:
connector.class
kafka.api.key
kafka.api.secret
topics
input.data.format
output.data.format
gcs.credentials.config
gcs.bucket.name
time.interval
tasks.max
Configuration properties that are not listed use the default values. For default
values and property definitions, see GCS Sink Connector Configuration Properties.
Step 3: Create the connector configuration file.
Create a JSON file that contains the connector configuration properties. The following example shows the required connector properties.
{
    "name" : "confluent-gcs-sink",
    "connector.class" : "GcsSink",
    "kafka.api.key" : "<my-kafka-api-keyk>",
    "kafka.api.secret" : "<my-kafka-api-secret>",
    "topics" : "pageviews",
    "input.data.format" : "AVRO",
    "output.data.format" : "AVRO",
    "gcs.credentials.config" : "omitted"
    "gcs.bucket.name" : "<my-gcs-bucket-name>",
    "time.interval" : "HOURLY",
    "flush.size": "1000",
    "tasks.max" : "1"
}
Note the following property definitions:
"name": Sets a name for your new connector.
"connector.class": Identifies the connector plugin name.
"topics": Identifies the topic name or a comma-separated list of topic names.
"input.data.format": Sets the input message format (data coming from the Kafka topic). Valid entries are AVRO, JSON_SR, PROTOBUF, JSON, or BYTES. You must have Confluent Cloud Schema Registry configured if using a schema-based message format (for example, Avro, JSON_SR (JSON Schema), or Protobuf).
Note
Input format JSON to output format AVRO does not work for the preview connector.
"output.data.format": Sets the output message format (data coming from the connector). Valid entries are AVRO, JSON, or BYTES. You must have Confluent Cloud Schema Registry configured if using a schema-based output message format (for example, Avro).
"gcs.credentials.config": This contains the contents of the downloaded JSON file. See Formatting GCS credentials for details about how to format and use the contents of the downloaded credentials file.
rotate.schedule.interval.ms and rotate.interval.ms: See Scheduled Rotation for details about using these properties.
(Optional) flush.size: This value defaults to 1000. The default value can be raised (and lowered, if running a dedicated cluster).
The following scenarios describe a couple of ways records may be flushed to storage:
You use the default setting of 1000 and your topic has six partitions. Files start to be created in storage after more than 1000 records exist in each partition.
You use the default setting of 1000 and the partitioner is set to Hourly. 500 records arrive at one partition from 2:00pm to 3:00pm. At 3:00pm, an additional 5 records arrive at the partition. You will see 500 records in storage at 3:00pm.
Note
The properties rotate.schedule.interval.ms and rotate.interval.ms
can be used with flush.size to determine when files are created in
storage. These parameters kick in and files are stored based on which
condition is met first.
For example: You have one topic partition. You set flush.size=1000 and
rotate.schedule.interval.ms=600000 (10 minutes). 500 records arrive at
the topic partition from 12:01 to 12:10. 500 additional records arrive from
12:11 to 12:20. You will see two files in the storage bucket with 500
records in each file. This is because the 10 minute
rotate.schedule.interval.ms condition tripped before the
flush.size=1000 condition was met.
"time.interval": Sets how your messages are grouped in the GCS bucket. Valid entries are DAILY or HOURLY.
Tip
The time.interval property above and the following optional properties topics.dir and path.format can be used to build a directory structure for data stored in S3. For example: You set "time.interval" : "HOURLY", "topics.dir" : "json_logs/hourly", and "path.format" : "'dt'=YYYY-MM-dd/'hr'=HH". The result in S3 is the directory structure: s3://<s3-bucket-name>/json_logs/daily/<Topic-Name>/dt=2020-02-06/hr=09/<files>.
The following are optional properties that can be used to organize your data in storage:
"topics.dir": A top-level directory path to use for data stored in S3. Defaults to topics if not used.""path.format": Configures the time-based partitioning path created in S3. The property converts the UNIX timestamp to a date format string. If not used, this property defaults to 'year'=YYYY/'month'=MM/'day'=dd/'hour'=HH if an Hourly time.interval was selected or 'year'=YYYY/'month'=MM/'day'=dd if a Daily Time interval was selected.
Configuration properties that are not listed use the default values. For default
values and property definitions, see GCS Sink Connector Configuration Properties.
Step 4: Load the configuration file and create the connector.
Enter the following command to load the configuration and start the connector:
ccloud connector create --config <file-name>.json
For example:
ccloud connector create --config gcs-sink-config.json
Example output:
Created connector confluent-gcs-sink lcc-ix4dl
Step 5: Check the connector status.
Enter the following command to check the connector status:
Example output:
ID          |       Name         | Status  | Type
+-----------+--------------------+---------+------+
lcc-ix4dl   | confluent-gcs-sink | RUNNING | sink
Step 6: Check the GCS bucket.
Go to the the bucket Objects page for your GCS bucket.
Open your topic folder and each subsequent folder until you see your messages displayed.
You can manage your full-service connector using the Confluent Cloud API. For details, see the Confluent Cloud API documentation.
Tip
When you launch a connector, a Dead Letter Queue topic is automatically created. See Dead Letter Queue for details.
For additional information about the GCS connector see Google Cloud Storage Sink Connector for Confluent Platform. Note that not all Confluent Platform GCS connector features are provided in the Confluent Cloud GCS connector.
Scheduled Rotation
Two optional properties are available that allow you to set up a rotation schedule. These properties are provided in the Confluent Cloud GUI (shown below) and in the Confluent Cloud CLI.
rotate.schedule.interval.ms (Scheduled rotation): This property allows you to configure a regular schedule for when files are closed and uploaded to storage. The minimum value is 600000 ms (10 minutes). The default value is -1 (disabled). When this is set for 600000 ms, you will see files available in the storage bucket at least every 10 minutes. rotate.schedule.interval.ms does not require a continous stream of data.
Note
Using the rotate.schedule.interval.ms property results in a non-deterministic environment and invalidates exactly-once guarantees.
rotate.interval.ms (Rotation interval): This property allows you to specify the maximum time span (in milliseconds) that a file can remain open for additional records. When using this property, the time span interval for the file starts with the timestamp of the first record added to the file. The connector closes and uploads the file to storage when the timestamp of a subsequent record falls outside the time span set by the first file’s timestamp. The minimum value is 600000 ms (10 minutes). This property defaults to the interval set by the time.interval property. rotate.interval.ms requires a continous stream of data.
Important
The start and end of the time span interval is determined using file timestamps. For this reason, a file could potentially remain open for a long time if a record does not arrive with a timestamp falling outside the time span set by the first file’s timestamp.
Next Steps
See also
For an example that shows fully-managed Confluent Cloud connectors in action with Confluent Cloud ksqlDB, see the Cloud ETL Demo. This example also shows how to use Confluent Cloud CLI to manage your resources in Confluent Cloud.